一,安装dnsmasq,在绝大部分发行版中都有提供
# Centos,Fedora
yum install dnsmasq -y

# Debian,Ubuntu
apt-get install dnsmasq -y
二,修改dnsmasq配置文件
打开主配置文件,在头部加入几行
vi /etc/dnsmasq.conf
# 使用的hosts文件路径(可选)
addn-hosts=/etc/dnsmasq.hosts
# 记录缓存时间,单位为秒
local-ttl=3600
# 最大记录条数
dns-forward-max=1000000
# 当提供对外解析时,需要加入监听地址
listen-address=127.0.0.1,10.100.231.55
# 上游DNS服务器地址的配置文件
resolv-file=/etc/dnsmasq.nameserver.conf
# 可查询列表内的所有上游DNS服务器
all-servers
# 自定义DNS记录的配置目录
conf-dir=/etc/dnsmasq.d
再添加上游DNS服务器地址,
vi /etc/dnsmasq.nameserver.conf
# 阿里公共DNS
nameserver 223.5.5.5
nameserver 223.6.6.6
# 百度公共DNS
nameserver 180.76.76.76
# 114DNS,不建议使用,在多地已被污染
nameserver 114.114.114.114
nameserver 114.114.115.115
根据情自身情况,可以填写hosts文件,
vi /etc/dnsmasq.hosts
# 格式例子
1.1.1.1    mydoname.com
三,打开防火墙端口
# 使用firewall开放端口,并应用设置
systemctl enable firewalld
firewall-cmd --zone=public --add-port=53/udp --permanent
systemctl restart firewalld

# 或者使用ufw开放端口
apt-get install ufw
ufw allow dns
ufw enable
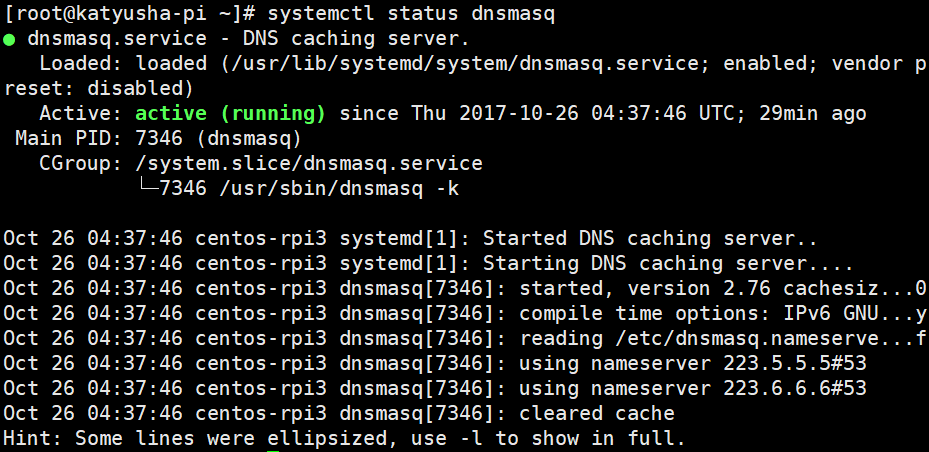
四,查看DNS服务是否正常运行
在服务器上:
在Windows上:
